![]() This functionality is available for PRO version.
This functionality is available for PRO version.
What this guide covers
This edited, step-by-step guide shows two clear ways to deploy WP Hide rewrites when your server runs Nginx:
- Manual deployment — copy the rewrite block from the plugin Setup screen into your Nginx site config (classic, immediate method).
- File-based deployment — enable the plugin option that writes rewrites to wphide-nginx.conf, then include that file from your server configuration (cleaner and easier for automated changes).
Both approaches end with testing, restarting/reloading Nginx, and confirming the plugin.
Why is this different from Apache
On Apache (LAMP) WordPress can write .htaccess directly from PHP. Nginx has no per-site .htaccess equivalent and its configuration files are edited by the system administrator. That means WP Hide can generate rewrite rules, but when Nginx is a full stack (LEMP) you must deploy those rules into the Nginx configuration yourself. Managed hosts (Kinsta, WPEngine, etc.) often restrict direct access — in those cases you must open a support ticket and provide the rewrite block.
Before you start — checklist
- You have SSH access to your server (or a control panel that allows editing Nginx config files).
- You know where your site config lives (commonly /etc/nginx/sites-available/your-domain.conf).
- You have a backup of any Nginx config you will modify.
- You can run
sudo nginx -tand sudo service nginx reload (or equivalent commands on your system).
Method 1 — Manual copy & paste into the server block (quick)
-
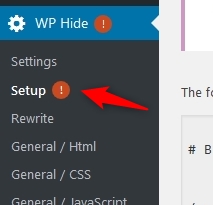
- In WP Admin, open WP Hide → Setup and change any plugin options you need. All rewrites and changes can be found at WP Hide > Setup interface
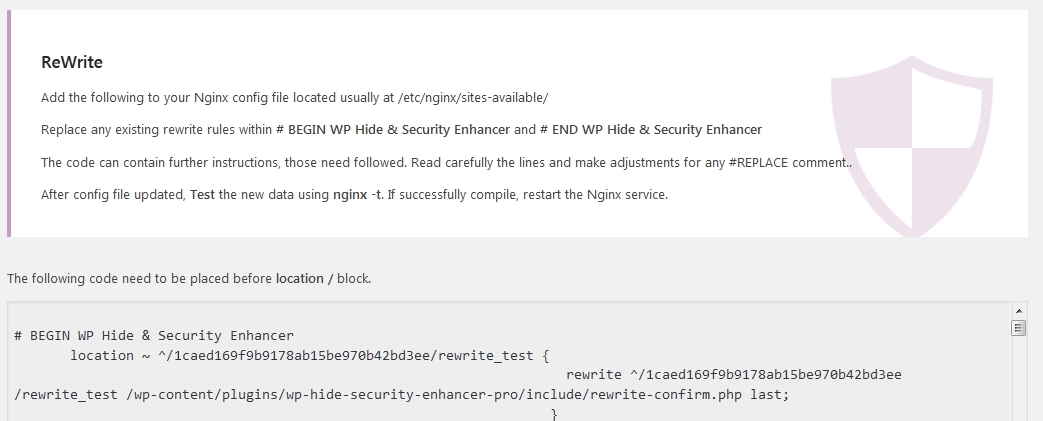
- If the plugin requires server rewrites, the Setup menu item will show a red mark. Open Setup and copy the rewrite data from the ReWrite area.
- SSH to your server and open your site configuration file. Typical path:
sudo nano /etc/nginx/sites-available/your-domain.conf - Find the location / { line inside the server block and paste the WP Hide rewrite block just above that line. If there are previous WP Hide rewrites, remove them first.
- Test Nginx for syntax errors:
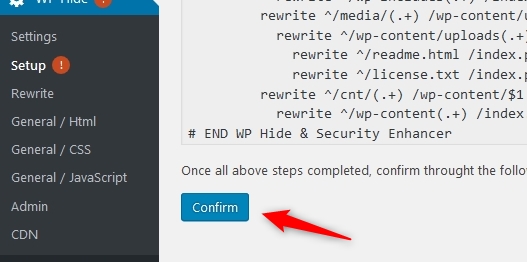
sudo nginx -t sudo service nginx reload# or:sudo systemctl reload nginx- Return to WP Hide Setup and click Confirm so the plugin double-checks the rewrites and activates the updated options.
- Clear any site caches (cache plugin, CDN) and test your site to ensure the rewrites work as expected.
- In WP Admin, open WP Hide → Setup and change any plugin options you need. All rewrites and changes can be found at WP Hide > Setup interface
On certain servers, like Kinsta, WPEngine etc, there is no direct access to the server Nginx config file, this is done through Live Help area, the support representative will add the rewrite lines for you.
See the Video at the end of the article for more details.
Method 2 — Save rewrites to wphide-nginx.conf and include them (recommended for cleaner management)
This method delegates the rewrite block to a small file in your site root (wphide-nginx.conf) and uses the server include directive to load it. That means when WP Hide updates the file, you only need to reload Nginx — the main site config stays unchanged. Advanced details regarding the option can be found Here.
- In WP Hide > Setup, enable Save the Nginx Rewrites to a wphide-nginx.conf (or similarly named) option. The plugin will try to write a wphide-nginx.conf file into your site root.
- Open your site Nginx file (/etc/nginx/sites-available/your-domain.conf) and add an include line inside the server block (or inside http {} depending on your setup). Example:
http {
    # Other configuration settings...

    server {
        # Your existing server block configuration...

        include /path/to/your/site/root/wphide-nginx.conf;
    }
}
Make sure to replace /path/to/your/site/root/wphide-nginx.conf with the exact path WP Hide shows in Setup interface.
- Reload Nginx:
sudo service nginx reload - In WP Hide Setup click Confirm so the plugin verifies the rewrites are active.
- Clear site caches and test.
Advantages: the server config remains stable and you centralize WP Hide rules in one include file. When WP Hide updates that file you only need to reload Nginx, not copy/paste the block every time.
Note about file permissions: if the plugin cannot write wphide-nginx.conf automatically, create the file yourself with the content WP Hide provides and set appropriate ownership (usually the same user as your web files) so the plugin can update it later if needed.
Tests & troubleshooting
- Always run sudo nginx -t after changing config — it catches syntax errors before restart.
- If rewrites are not applied, check the include path is correct and that Nginx was reloaded after changes.
- On managed hosts without direct file access (Kinsta, WPEngine), open a support ticket and paste the rewrite block for their support to add.
- After confirming in the plugin, clear cache layers (WP cache plugin, object cache, CDN) to ensure changes are visible.
If you need help with plugin setup or deployment, our team is happy to assist — simply reach out to us through the contact form.
Video
The following video demonstrate the process per above steps, on a standard LEMP stack on Digitalocean.


