The Import / Export feature in WP Hide PRO offers a streamlined solution for replicating and migrating configuration settings between different WordPress installations. This functionality is particularly beneficial when transferring a setup from one site to another, ensuring consistency and saving time during deployment. Below, we provide a detailed guide to using this feature effectively.
Overview of the Import / Export Feature
The Import / Export functionality allows you to back up, transfer, or restore your WP Hide PRO configurations quickly. This is ideal for developers managing multiple websites or users who wish to clone a site’s setup without manually reconfiguring each parameter.
The process is straightforward:
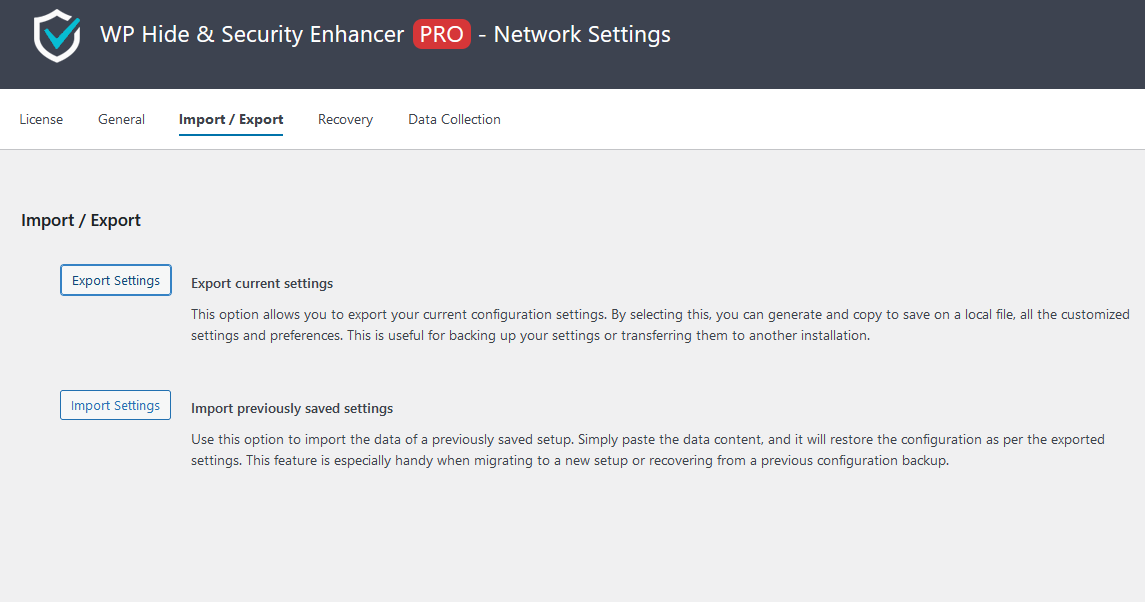
- Export Settings: Generate a configuration file or text from the source website.
- Import Settings: Apply the exported configuration to the target website.
By doing so, you can seamlessly replicate complex configurations and then make adjustments as necessary to align with the new site’s plugins, themes, and structure.
Step-by-Step Guide
Exporting Settings from the Source Website
- Navigate to Import / Export:
- Log into your WordPress dashboard.
- Go to WP Hide > Settings > Import / Export.
- Export Current Settings:
- Click the Export Settings button.
- A block of text representing your current WP Hide configuration will be generated.
- Copy this text and save it in a secure location, such as a text file on your local system.
Importing Settings to the Target Website
- Navigate to Import / Export:
- On the target WordPress site, go to WP Hide > Settings > Import / Export.
- Paste Configuration Data:
- Locate the previously exported configuration text.
- Paste it into the text area under Import Settings.
- Apply the Configuration:
- Click the Import Settings button.
- WP Hide PRO will process the data and apply the imported configuration to the target site.
 Post-Import Adjustments
While the Import / Export process ensures that most settings are transferred accurately, further fine-tuning is often required. This is because configurations are tied to the structure, plugins, and theme of the original site, which may differ on the target site.
- Review Plugins and Themes:
Ensure that the target site uses compatible plugins and themes. If any referenced components are missing, the configuration may not function as expected. - Test Functionality:
After importing the settings, thoroughly test the site to confirm that all functionalities are working correctly. Pay special attention to custom URLs, hidden paths, and rewritten elements. - Update Specific Settings:
Adjust any site-specific parameters, such as custom URLs that reference the original domain.
Benefits of Using Import / Export
The Import / Export feature offers several advantages:
- Time-Saving: Avoid the need to manually reconfigure settings when setting up a new site.
- Consistency: Ensure that multiple websites adhere to the same security and performance standards.
- Backup Capability: Maintain a copy of your WP Hide PRO configuration as a safeguard against accidental changes or data loss.
- Ease of Use: The intuitive interface requires no technical expertise, making it accessible to all users.
Best Practices
- Keep Backups Secure: Store your exported configuration text in a secure location to prevent unauthorized access.
- Validate Imported Settings: After importing, review the settings to confirm they align with the target site’s structure and requirements.
- Use for Migration Only: Avoid using the feature for unrelated or vastly different sites, as the configurations may cause compatibility issues.
The Import / Export feature in WP Hide PRO is a powerful tool for website administrators and developers. It simplifies the process of migrating configurations, ensuring efficiency and consistency across WordPress installations. By following the steps outlined above and adhering to best practices, you can leverage this feature to enhance your workflow and site management.


